Wedding DIY
Art Deco Wedding Invitation DIY with Download & Print
THIS POST CONTAINS AFFILIATE LINKSIf you’re a paper-lover like me, finding the perfect stationery for your big day is one of your top wedding priorities. And today I couldn’t be more excited to be not only introducing you to my latest wedding stationery discovery, Download & Print; but also bringing you the most fantastic (and easy to follow) tutorial for making these glamorous and Gatsby-inspired, Art Deco wedding invitations!
If you’ve not heard of them before, Download & Print are a fabulous resource for crafty couples looking to add a personal touch to their big day (as well as budget-savvy couples looking to save a few $s) by DIYing their stationery. Founder, and designer of these delightful templates, Anna Skye explains: “At Download & Print we want all of our customers to experience the joy of presenting a handmade invitation to someone they love. We design invitation templates that can be easily personalized in Microsoft Word or Mac Pages. With our templates Bride’s can make invitations for a fraction of the retail and online price. We are proud to have helped Bride’s all over the world create invitations, as far away as South Africa, UK, Australia, France, Canada, and Saudi Arabia; using our templates.”
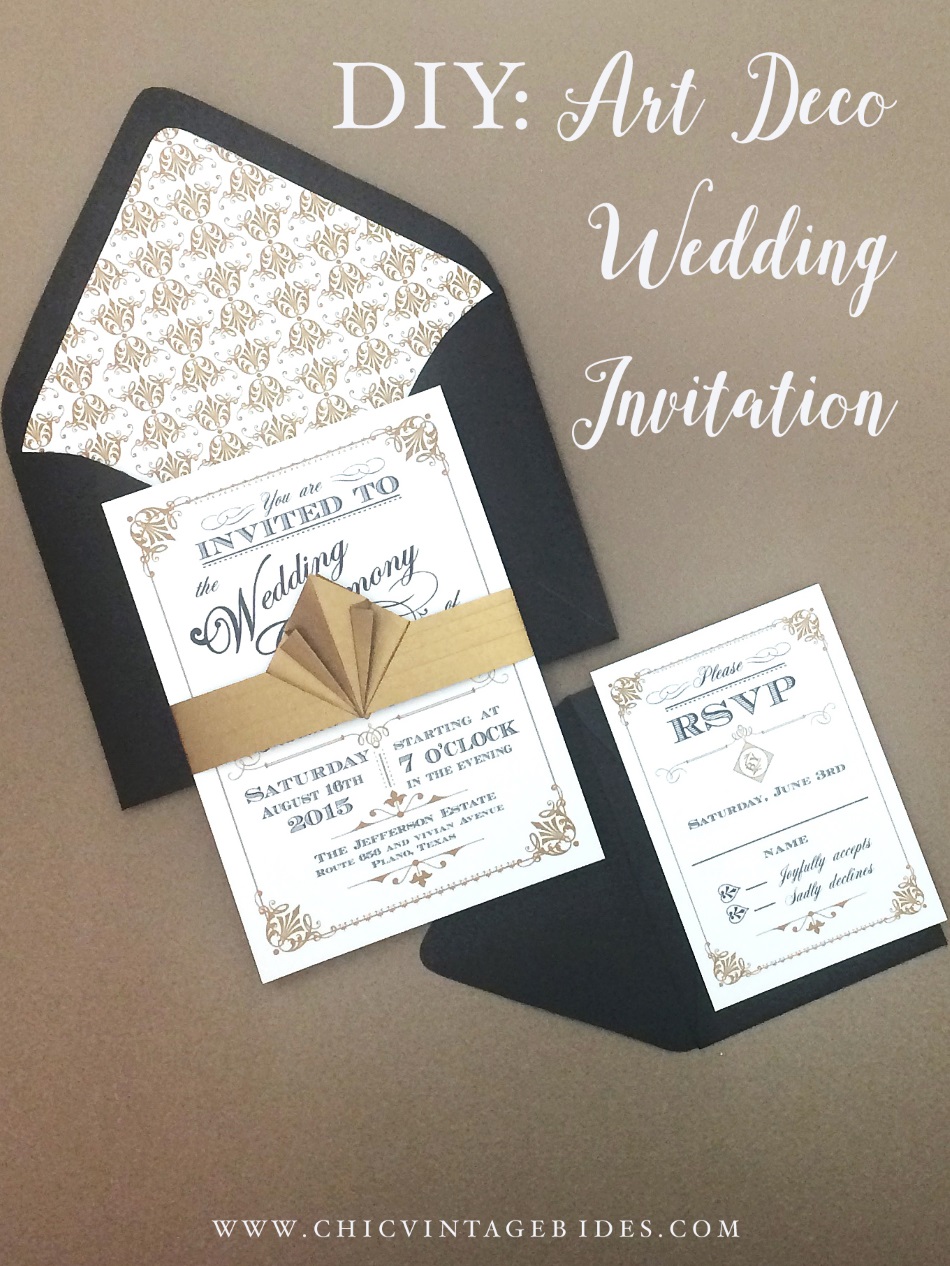
With a library of available design templates, and all at super reasonable prices, you’re sure to find the perfect suite for you, whatever your style, theme or budget – they even have plenty of fab freebies too! Including today’s swanky Art Deco inspired design from the Ornate Vintage collection, which just happens to be one of the most popular wedding invitations on Download & Print – and it’s easy to see why! The detailed scroll work and gorgeous fonts take us back to a golden age of jazz, flapper girls and F. Scott Fitzgerald glamour! The full suite of 15 matching pieces, which includes all your day of stationery, thankyou cards and everything, is a bargain at $49. But if all you want is the invite, envelope liner and RSVP then you’re in luck, because today Anna is giving them away for FREE!
Now, let me hand you over to Anna for the step by step tutorial, but first a quick run down of what you’ll need…..
Supplies
– Printable templates
– Printer
– White or cream card stock
– Paper cutter and/or scissors
– Double sided tape
– Black euro flap A7 envelope
– Black 4-bar envelope
– Gold star dream paper
– Bone folder
– Scoring tool
– Ruler
Oh, and when you reach the end of this tutorial, do check out the video for details on how to make the intricate art deco belly band. To me this is the show stopper. And I’m going to let you in on a little secret, it’s super easy to make. Enjoy!
Step 1: Download & Print
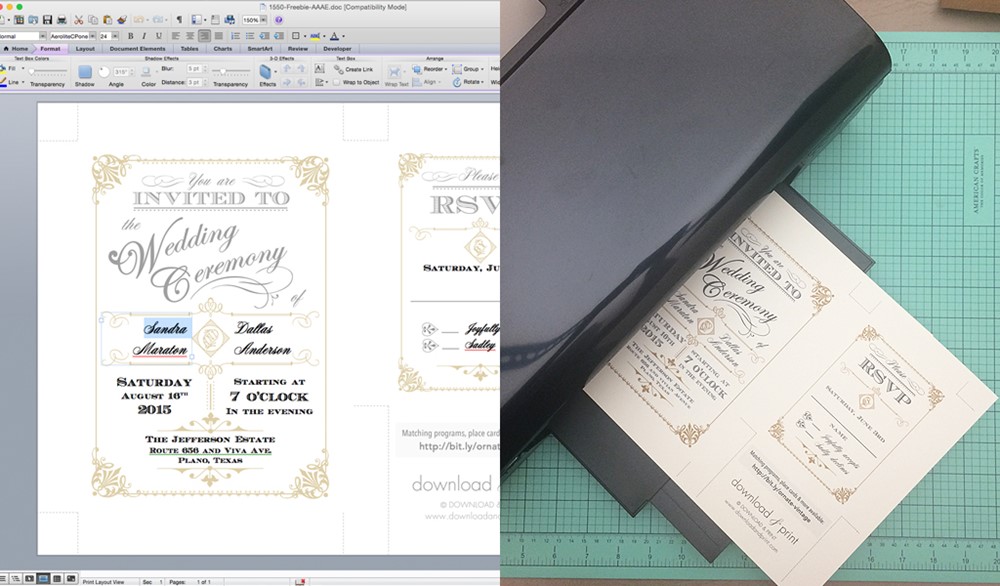
Download the DIY vintage wedding invitation and open in MS Word or Mac Pages. Add your wedding details to the invitation and RSVP. The fonts used are Ecuyer DAX and Aerolite CP – both are free fonts. So download the fonts to your computer, then open Word and the template.
Only the dark text in the picture above can be changed. The heading text that is grayed out cannot be changed. Print the file.
TIP: Print one copy and check for accuracy. Have someone else check the file for correct spelling and dates for you too, because there is nothing worse than printing 100 copies to find you’ve entered the wrong date!
When choosing paper I recommend paper that is between 65 lbs and 90 lbs. This is a heavier weight than standard copy paper to give a luxurious feel, but not so heavy that it will jam your printer. You can also take the file and print at FedEx Office or your local copy shop. They will have a paper cutter on hand also to save you time on the next step.

Step 2: Trim
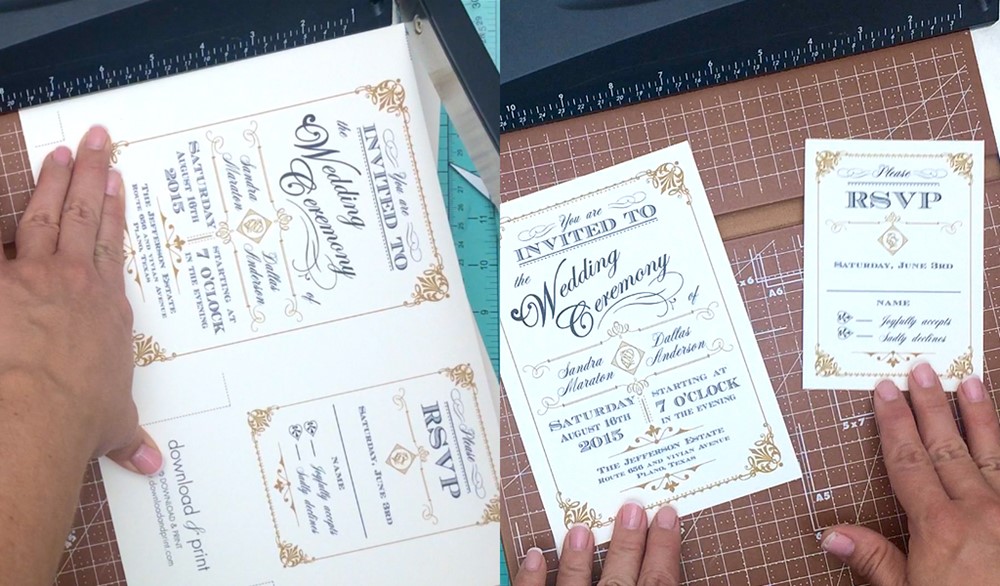
Use a paper cutter or scissors to trim along the cut lines. A paper cutter will produce straighter cuts and you can trim more than one sheet at once, speeding up the process. Plain old scissors will work just fine too though.
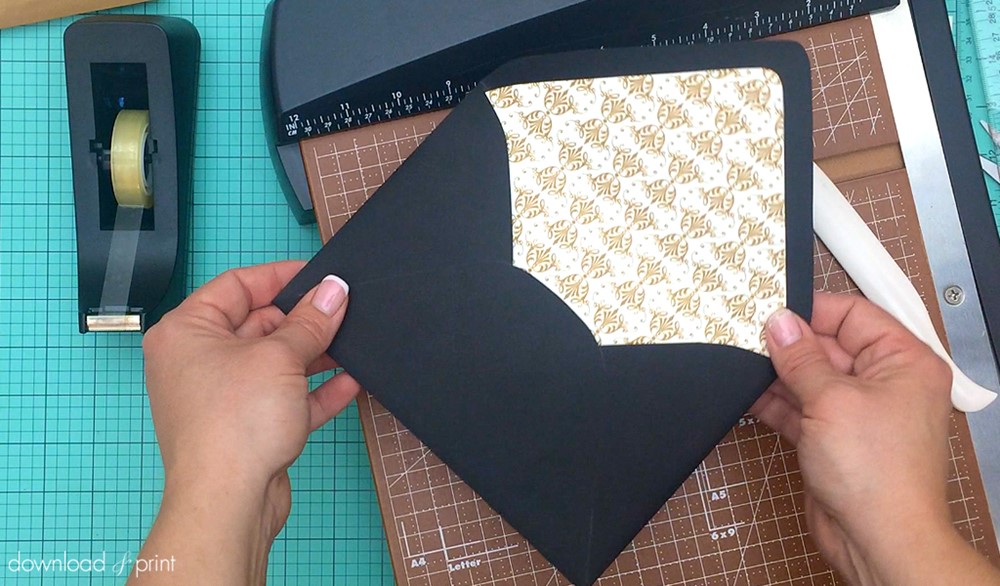
Step 3: Envelope Liner
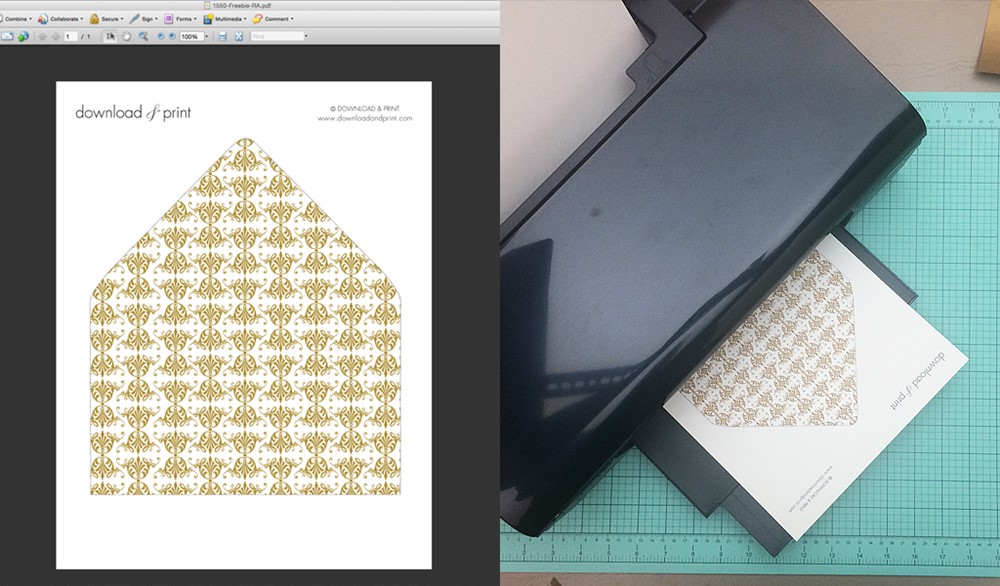
Print the envelope liner (it is the PDF file in the download) and trim around the edge. You can use a paper cutter on the three straight edges, then scissors for the curved flap. The trick to cutting a neat curve around the point is to hold your scissors still and rotate the paper.
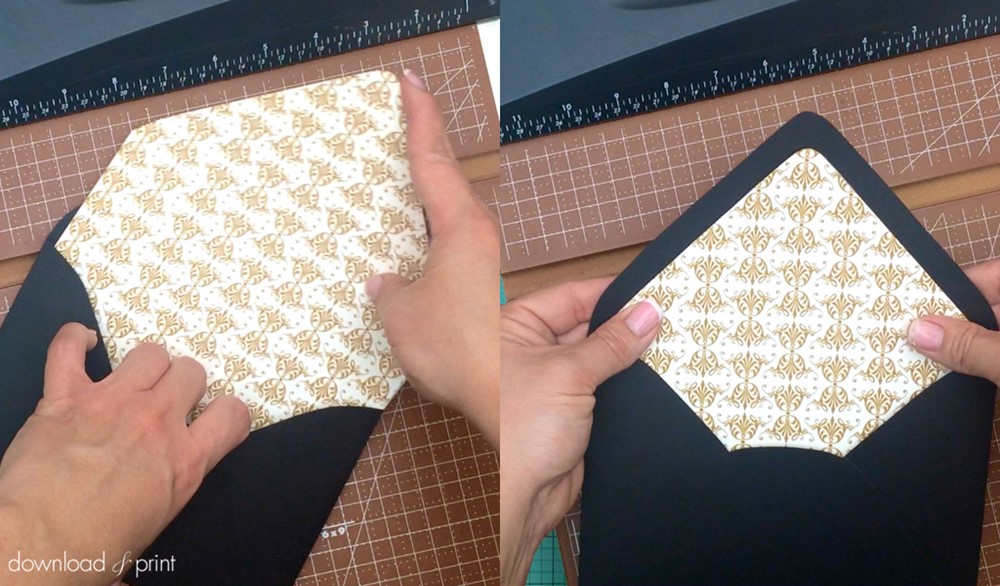
Insert the liner into an A7 euro flap envelope, lining up the top of the flap just below the envelope adhesive.
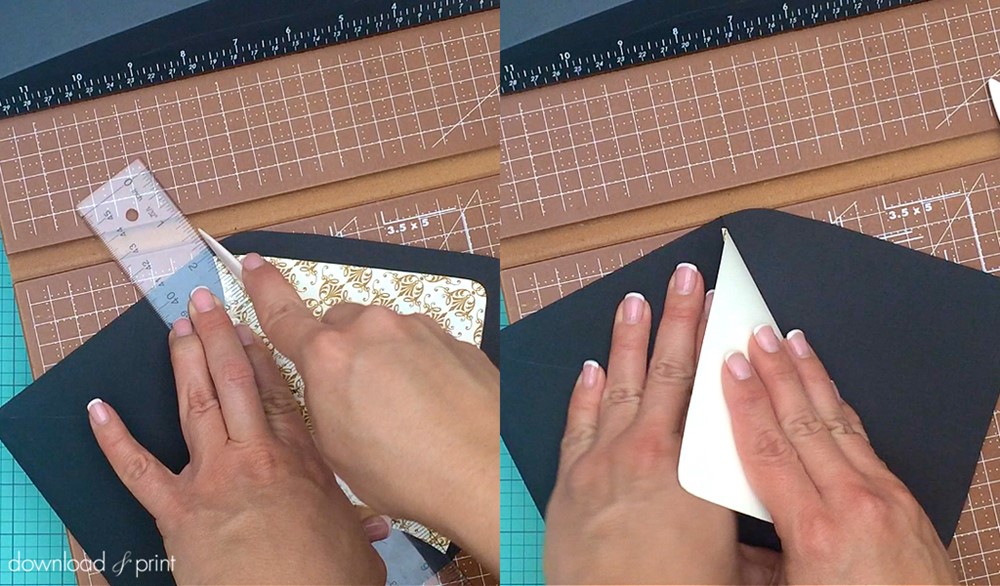
Score the liner along the same crease as on the envelope. You want the liner and envelope flap to fold together. If you don’t have a scoring tool, a closed mechanical pencil or back of a utility knife will create a crease. Just don’t use something that is sharp enough to cut the paper!
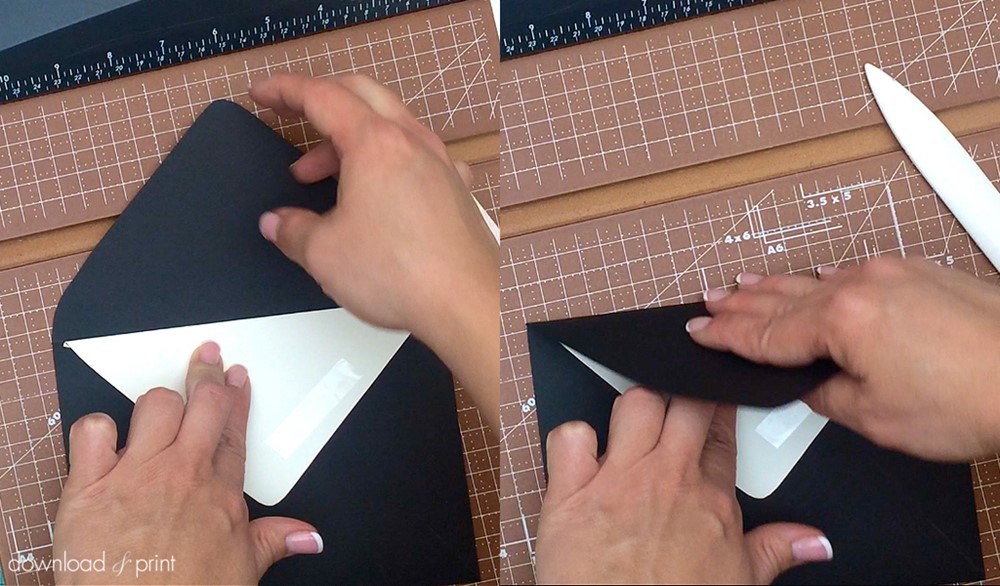
Fold the flap down and stick two pieces of double sided tape to the back. Fold the envelope flap over and push down to stick the liner and envelope together.
Step 4: Art Deco Band
And now for my favorite element to this set: The Art Deco Band! There’s no template for the band so you can change the sizes to fit your style and make the design your own. The dimensions listed below are what I used and what you see in the pictures.
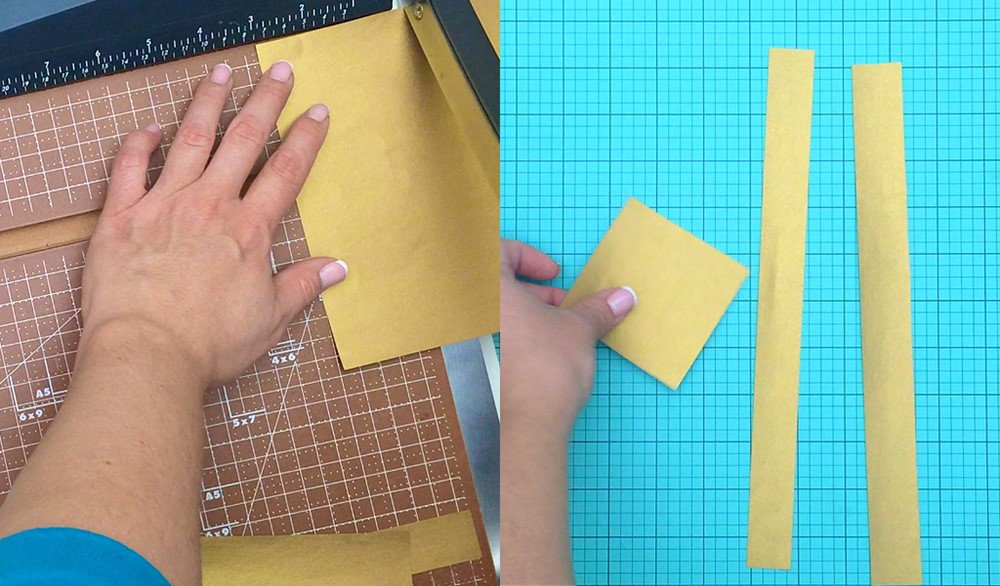
Cut 1” wide strips along the long edge of the gold paper. This forms the band that will wrap around your invitation set. I used a lighter weight paper that was easily folded around the invitation set. Cut 3” square pieces from the gold paper. We’ll fold this into the art deco badge.
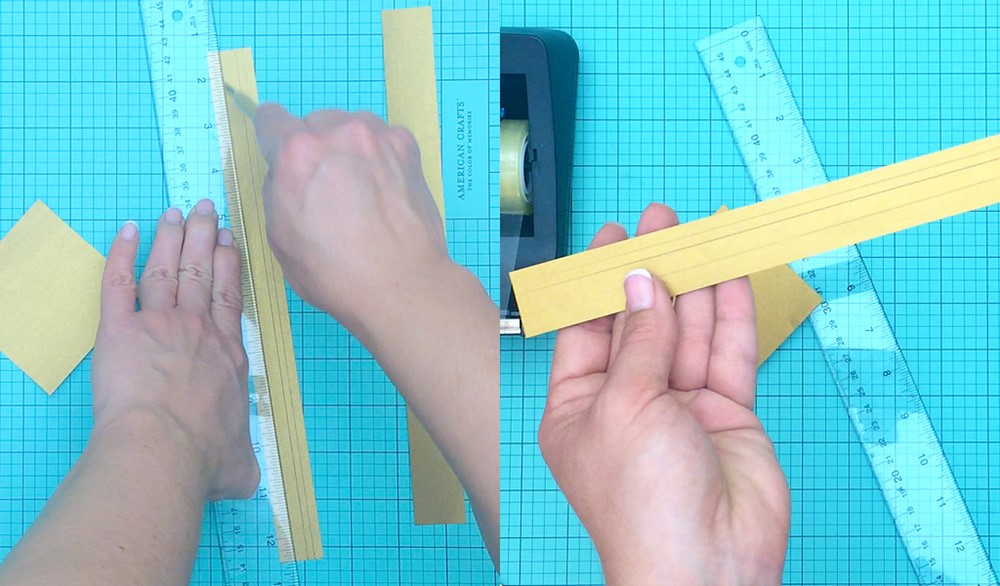
For some extra interest I used a scoring tool and created three lines along the strips of gold. This is entirely up to you though if you like the look or not, or have the time and patience to add in this step! I ran the tool along the band at random intervals, I had two lines closer together at the top, and another line near the bottom. Don’t cut the band! The scoring tool just creates an ever so slight indentation that adds interest when the band catches the light.
For the steps to create the origami art deco badge please watch the video – it’s so much easier to follow along with the video than try to explain here. Don’t worry though, it’s not hard to make; just a few folds and you’re done. The instructions for making the band and badge start at 5:45 in the video.
Step 5: Assemble the Set
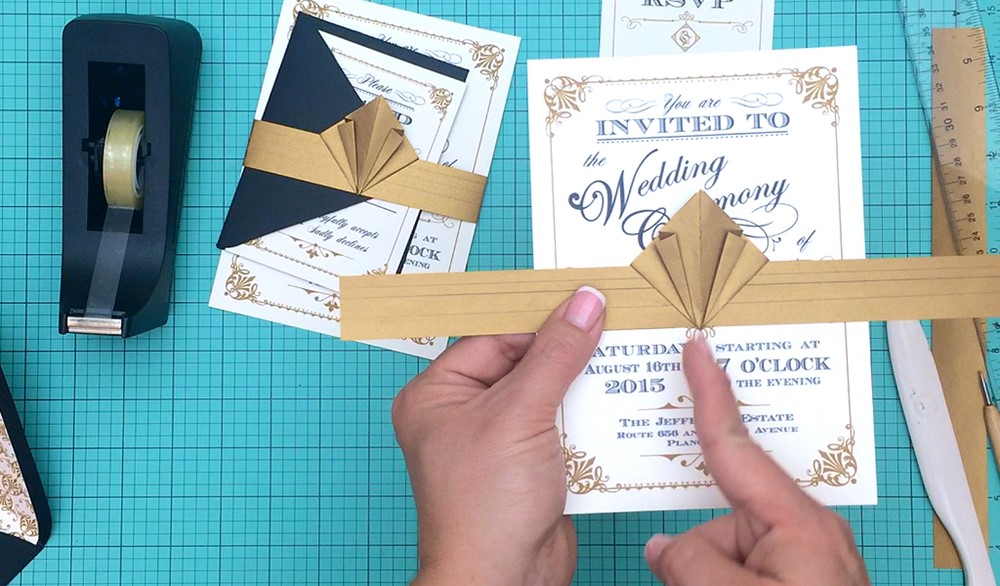
Line the bottom point of the art deco diamond with the center scroll on the DIY vintage wedding invitation and wrap around the band. Make sharp folds at the invitation edge and pull the band so that it’s snug against the invitation. Use double sided tape to adhere the band arms to each other at the back, without sticking the band to the invitation. It needs to be able to slide off easily. Slide in the RSVP with 4-bar envelope and sit them on top of the invitation. The set is now ready to stuff in the A7 envelope and mail.
Isn’t it fabulous? As a bride who DIYed her wedding invitations, this tutorial would have helped A LOT – and they would have looked SO much better! A huge thankyou to creator Anna Skye of Download & Print for sharing this fabulous DIY with us today.
Now, if you love this design but would like it in another color palette take a look at the 10 color choices here. Or if Anna’s wonderful designs and skills have inspired you to DIY your invites, check out Download & Print and use the exclusive coupon code ‘CVB10‘ for $10 off your membership.
And be sure to keep an eye out here on Chic Vintage Brides, because Anna will be back next month with another creative wedding invite DIY, with the sweetest vintage handkerchief design, that you definitely won’t want to miss!
Amy
x


