Wedding DIY
DIY Floral Chandelier
THIS POST CONTAINS AFFILIATE LINKSDIY projects for weddings are a fun way to get friends and family involved – and can be a budget friendly option for brides looking to save a few $s. You can craft beautiful flower crowns for you and your bridesmaids to wear, you can design your own wedding invitations and you can even create your own unique centerpieces! The possibilities are almost endless with the different things you can make. If you want to go above and beyond for your special day, why not try your hand at creating a beautiful floral chandelier?
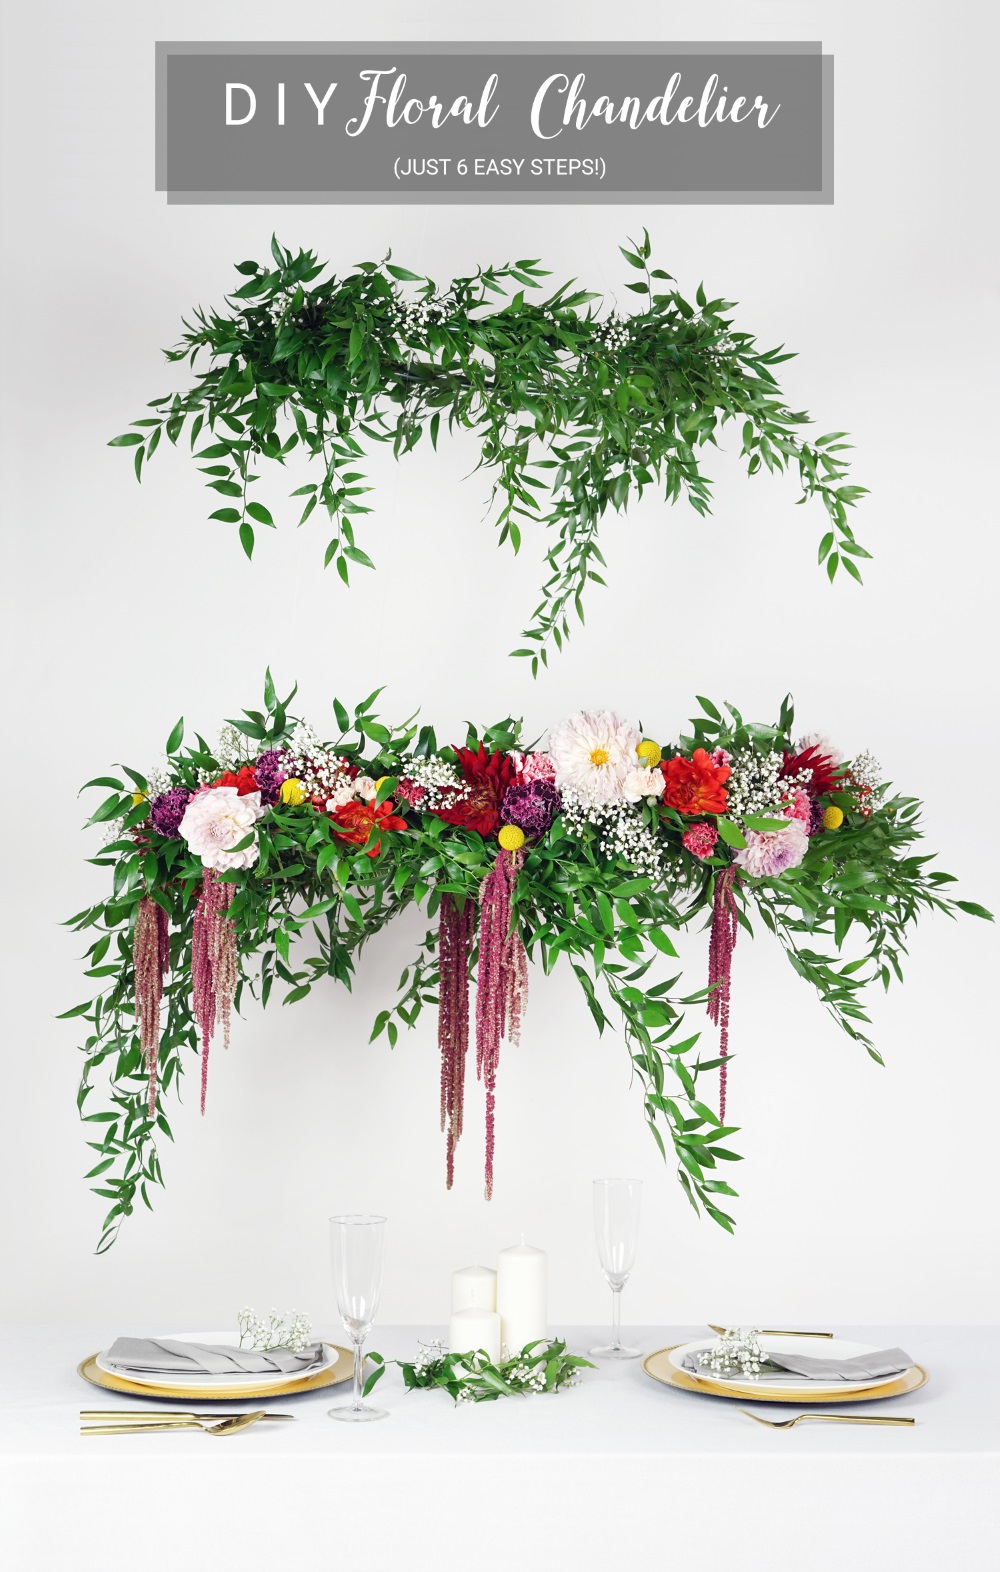

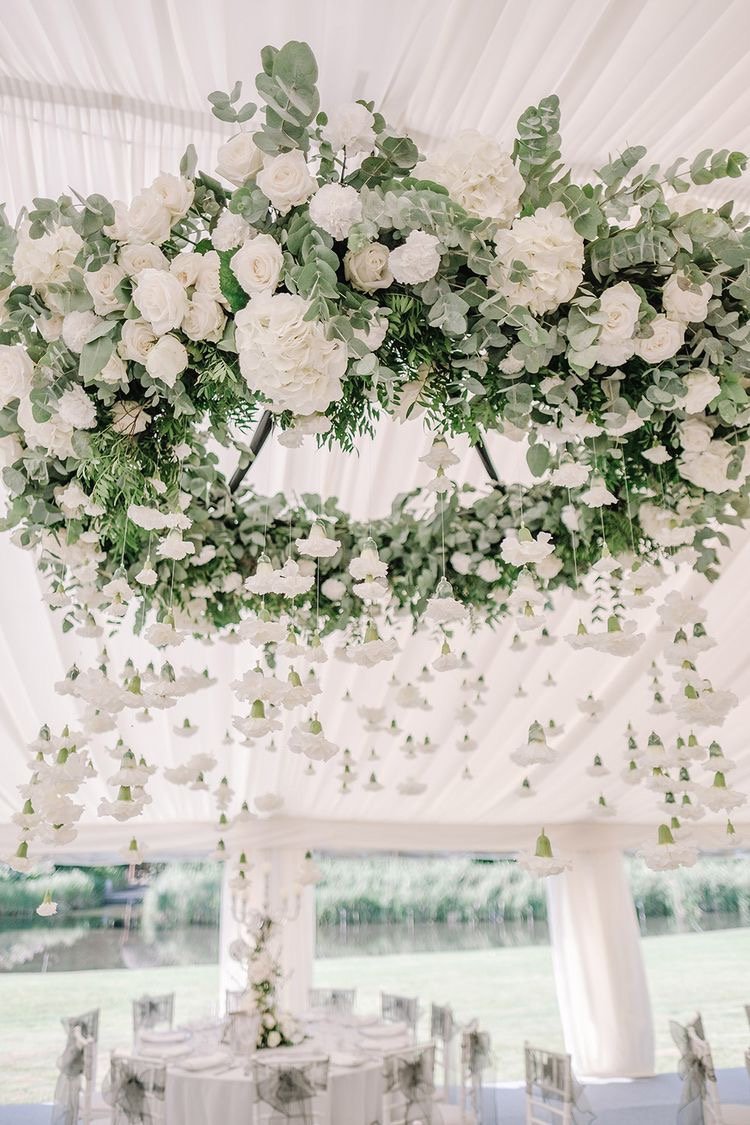
A handmade flower chandelier is the perfect decor item to really make a statement at your wedding! You can hang this show stopping piece above your dessert buffet or sweetheart table to really catch everyone’s eye, or you can frame your wedding ceremony under these hanging florals to paint a beautiful picture for your vow exchanges. Even though these chandeliers are super versatile, they still have a feature that tops it all! Flower chandeliers look grand but aren’t actually too difficult to make.
ProFlowers, who last month showed us how easy it is to make a beautiful flower crown, put together a step-by-step guide to help you create your own hanging flower chandelier. They include a full materials list including their recommended flowers and detailed steps to make sure you have the flower chandelier of your dreams for your big day. And if you’re stuck on what types of blooms and greenery to you use, you can check out their styling tips down below to see how other weddings put together their flower chandeliers.
Floral Chandelier Materials
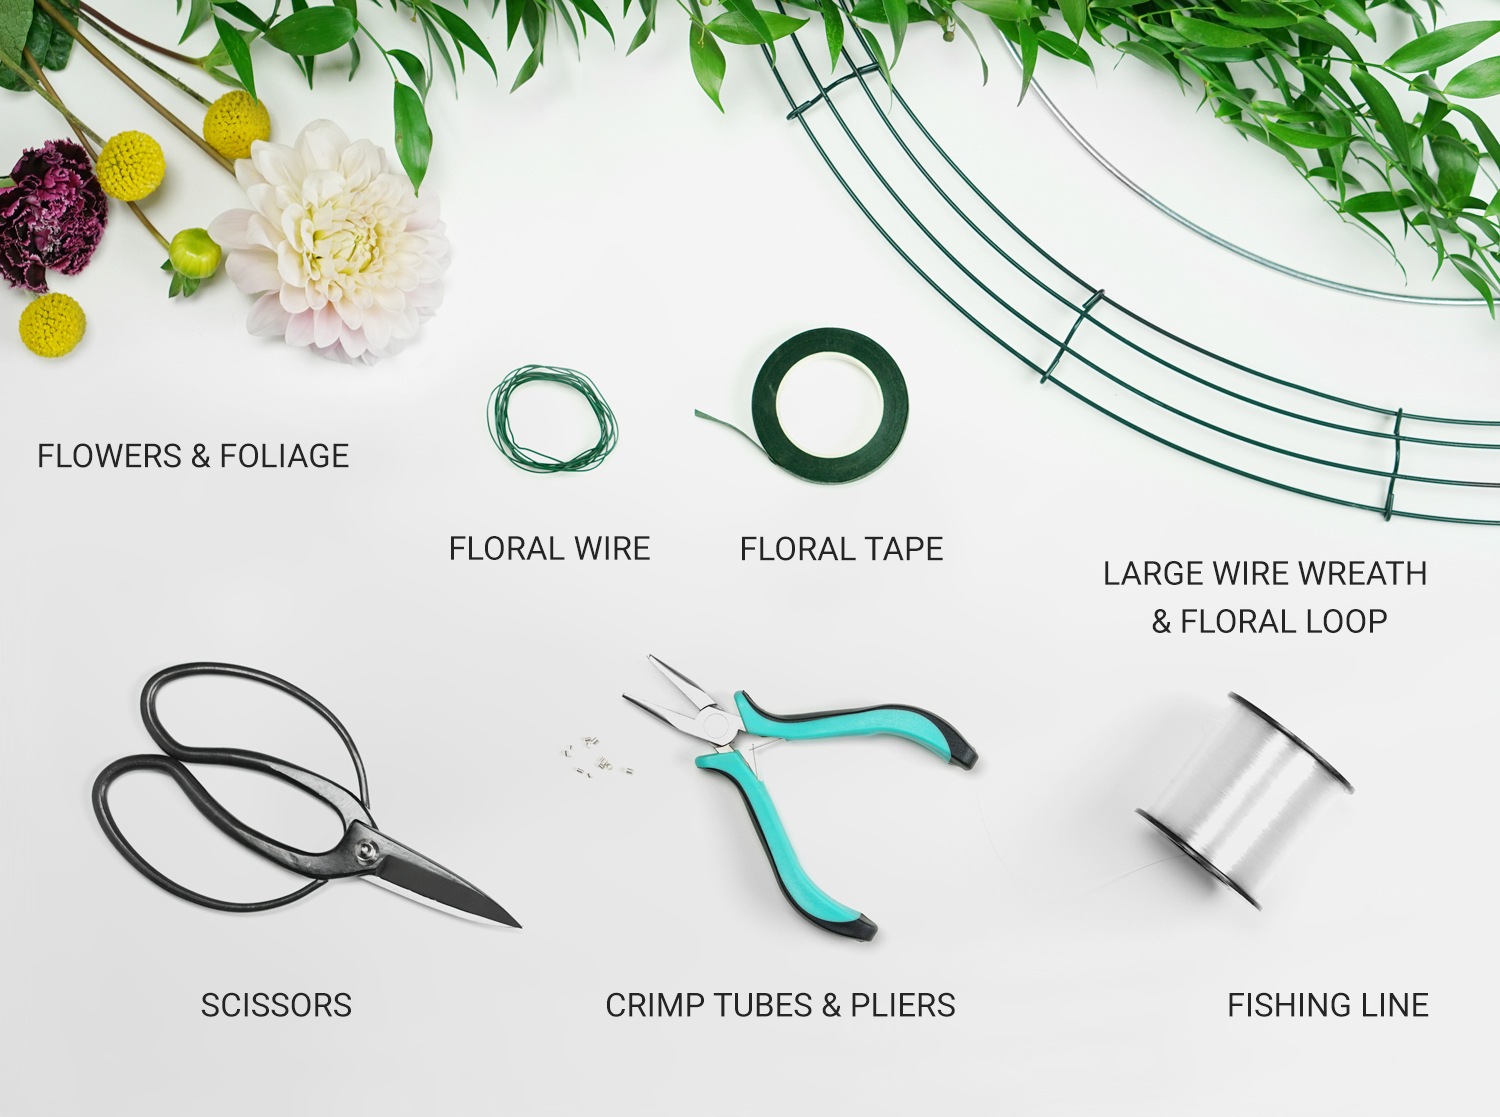
Fresh flowers – When selecting flowers, have a theme in mind, consider which blooms are in season and also which flowers will hold up the longest without water. Fresh blooms of different types work well for this project. The florals you select should have long stems, this will make it easier to attach the flowers by threading them through the base.
Fresh foliage – Select fresh foliage that matches the theme of your chandelier.
Floral hoop – You’ll need a floral hoop to create the top tier of your chandelier. We recommend a hoop that is 19 inches in diameter, but you can choose any size, as long as it’s smaller than the large wire wreath.
Large wire wreath – A large wire wreath frame will act as the base of your chandelier. We recommend one that is 24 inches in diameter. If you’re not able to find a suitable wire frame, a hula hoop will work just fine. A green hoop is ideal for this project, but if you can’t find one, you can always paint it.
Floral tape – Floral tape is ideal for fresh flowers due to its strength and elasticity. It also comes in natural hues like greens and browns which blend well with flowers.
Floral wire – You’ll use floral wire to attach fresh flowers and foliage to your small hoop and large wire frame.
Fishing line – You’ll need fishing line to hang your chandelier. You can also opt for twine, string or ribbon if you’re going for a rustic or vintage feel.
Scissors – You’ll need to cut the tape and fishing line, so have scissors or a sharp knife handy.
Crimp tubes – You’ll use crimp tubes to secure your fishing line in place. These are small metal rings that will make it so your knots don’t slip out of the fishing line.
Pliers – Pliers will be used to secure the crimp tubes to the fishing line.
Pro Tip: If you use a hula hoop for the base of the chandelier rather than the large wire wreath frame, paint it green the night before.
Make sure to have fun picking out your fresh florals and foliage. For this tutorial we used nine bushels of greenery and ten+ flower bouquets. To make your selection a little easier, we created a recommended list of flowers that are long lasting even when out of water.
Flower Chandelier Step by Step
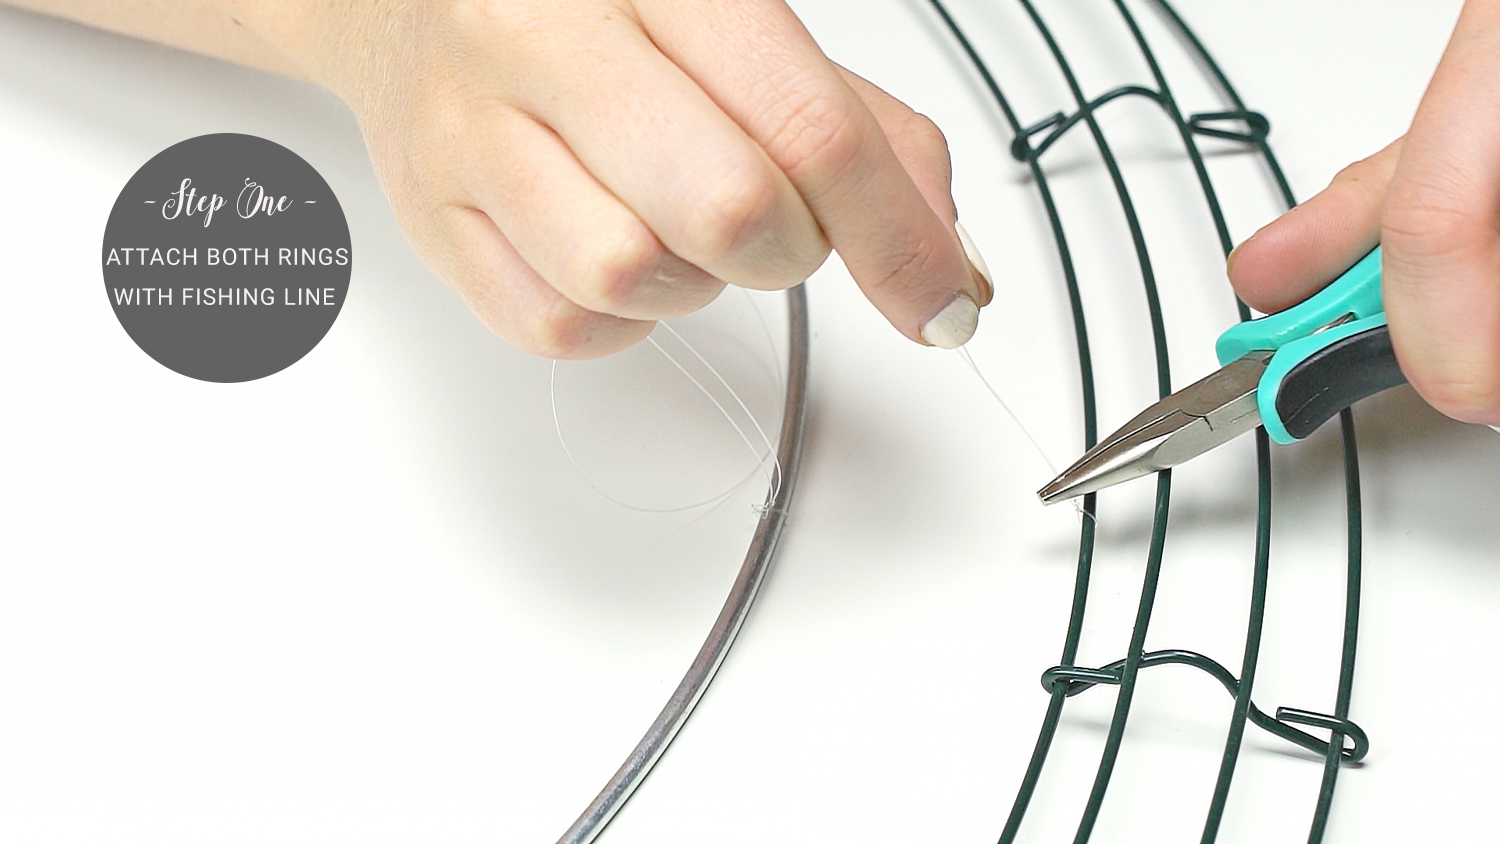
Step 1: Attach the large wire wreath to the floral hoop with the fishing line.
You should determine how far apart you want the wire wreath and the floral hoop to be, and then cut that amount of string in four pieces. Each piece of fishing line should be of the same length so that your chandelier hangs steadily. Attach the large wire wreath and the floral hoop together using the four pieces of fishing line evenly spaced around the diameter. Secure the line with traditional knots and a few pieces of scotch tape.
Pro Tip: Secure the knots using crimp tubes and pliers for a more steady chandelier.
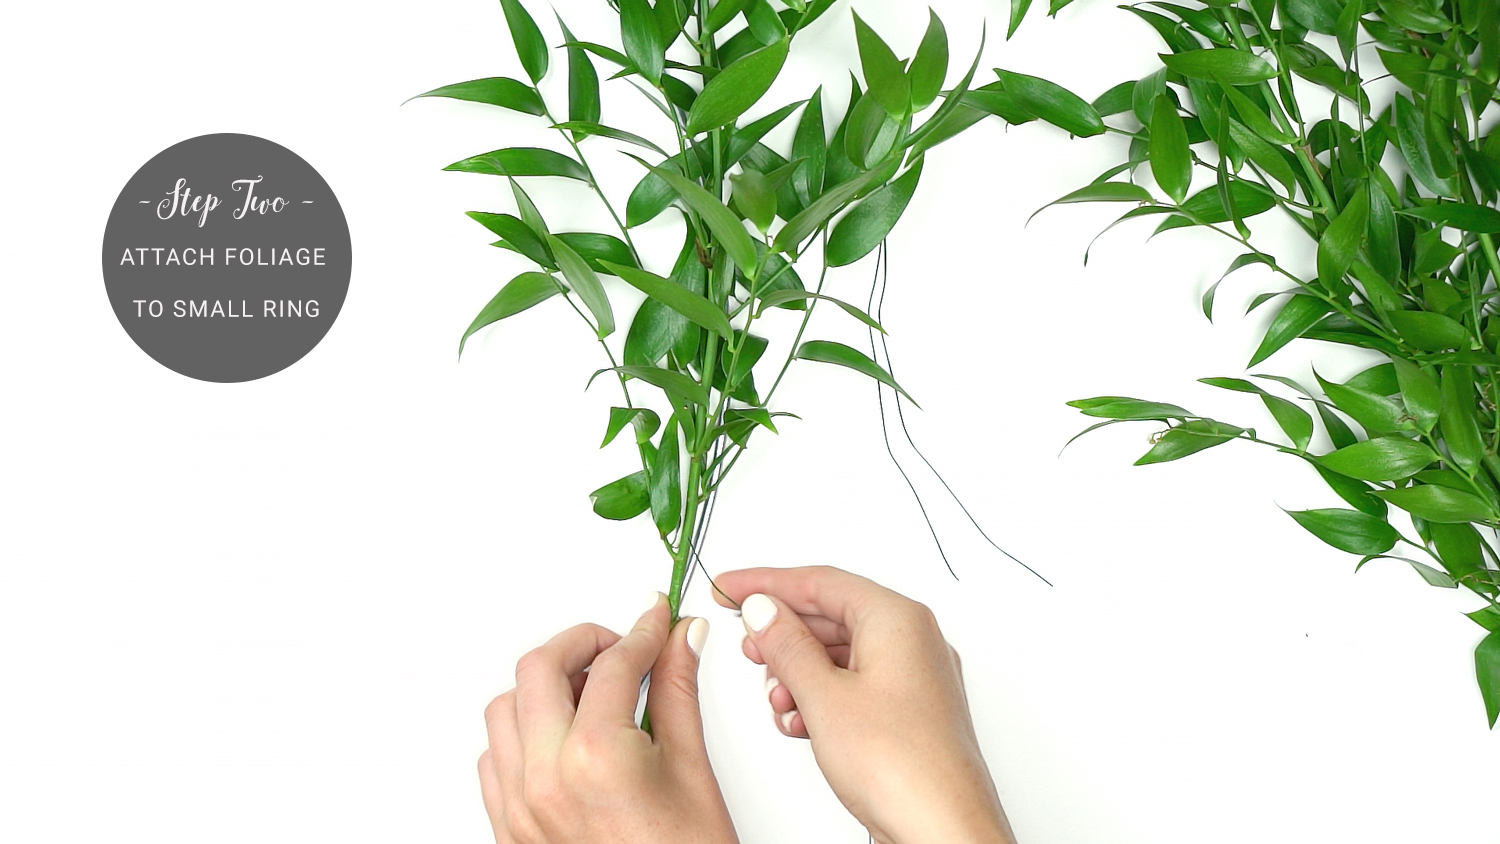
Step 2: Start by wrapping lengths of greenery and foliage around the small floral hoop.
Wrap the pieces around the hoop using a small piece of floral wire in order to secure them. Use the tape where you want to guarantee your greenery will stay put or where you think it is needed. You can also use a combination of both. Although, we mainly used the floral wire. Keep in mind the more secure your chandelier is, the better. Make sure that the foliage hangs naturally as you are wrapping. Distribute the greenery evenly and avoid leaving any open spaces between the wire ring and the large metal ring. You won’t be adding any flowers to the top tier of your chandelier, so feel free to make the foliage as dense as you’d like.
Pro Tip: Wind each piece of foliage around the wire ring for added support before attaching with the tape or floral wire.
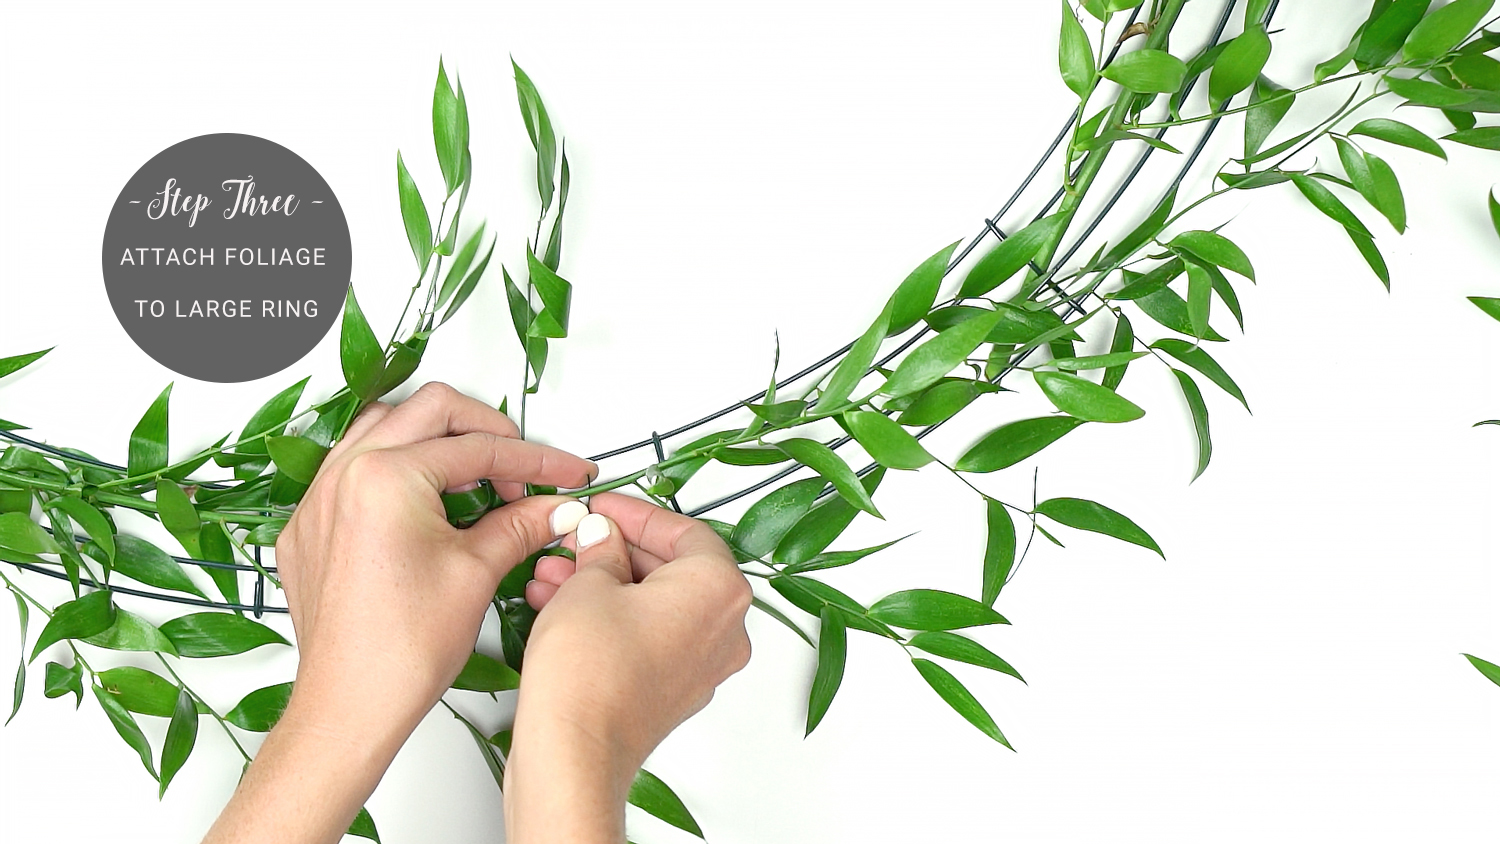
Step 3: Next, add greenery to the base of your chandelier, the large wire wreath.
After you’ve finished the top tier of your chandelier, move on to designing the bottom. This portion is the base of your chandelier, so create layers and design with intention as this is the part that’s most visible to guests. Start by adding a few layers of foliage wrapping each individual piece around the wire wreath one at a time securing with a small piece of floral wire. Be mindful of the manner in which the foliage hangs and set it in place using the wire and tape as needed.
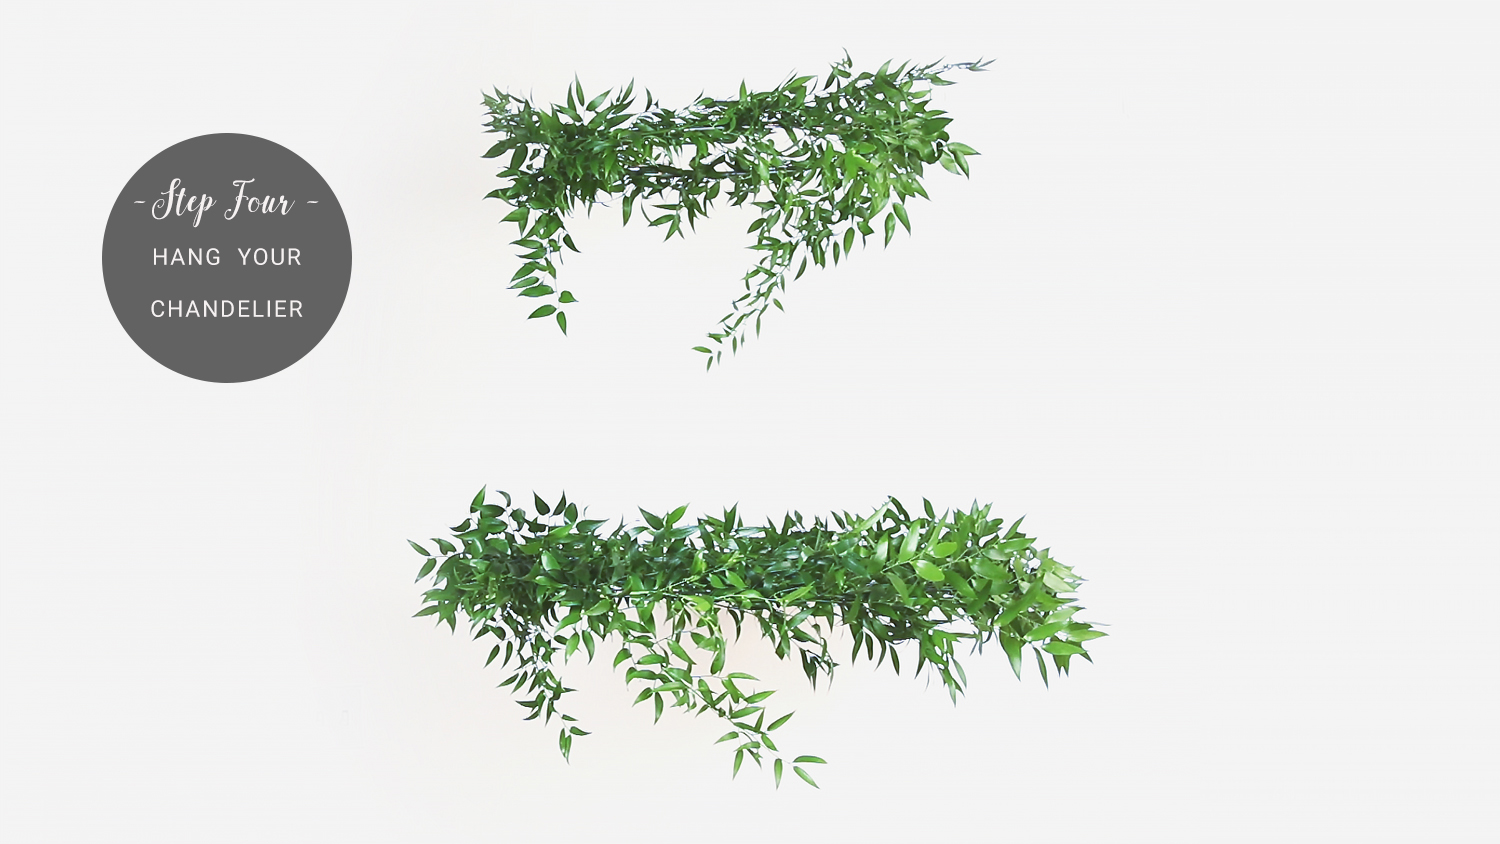
Step 4: Hang your chandelier.
It will be easier to design and assemble your flower chandelier while it’s hanging. Suspend the structure using fishing line, twine or ribbon, taking into consideration how the chandelier will hang. Will it be attached to the ceiling? An exposed beam? You should also consider the height you’d like your chandelier to be, and measure the length of line accordingly. Use three pieces of twine or fishing line of the same length to hang the chandelier. This will assure it’s balanced and will hang correctly. Secure your chandelier by tying extra knots and using crimp tubes and pliers to keep them in place.
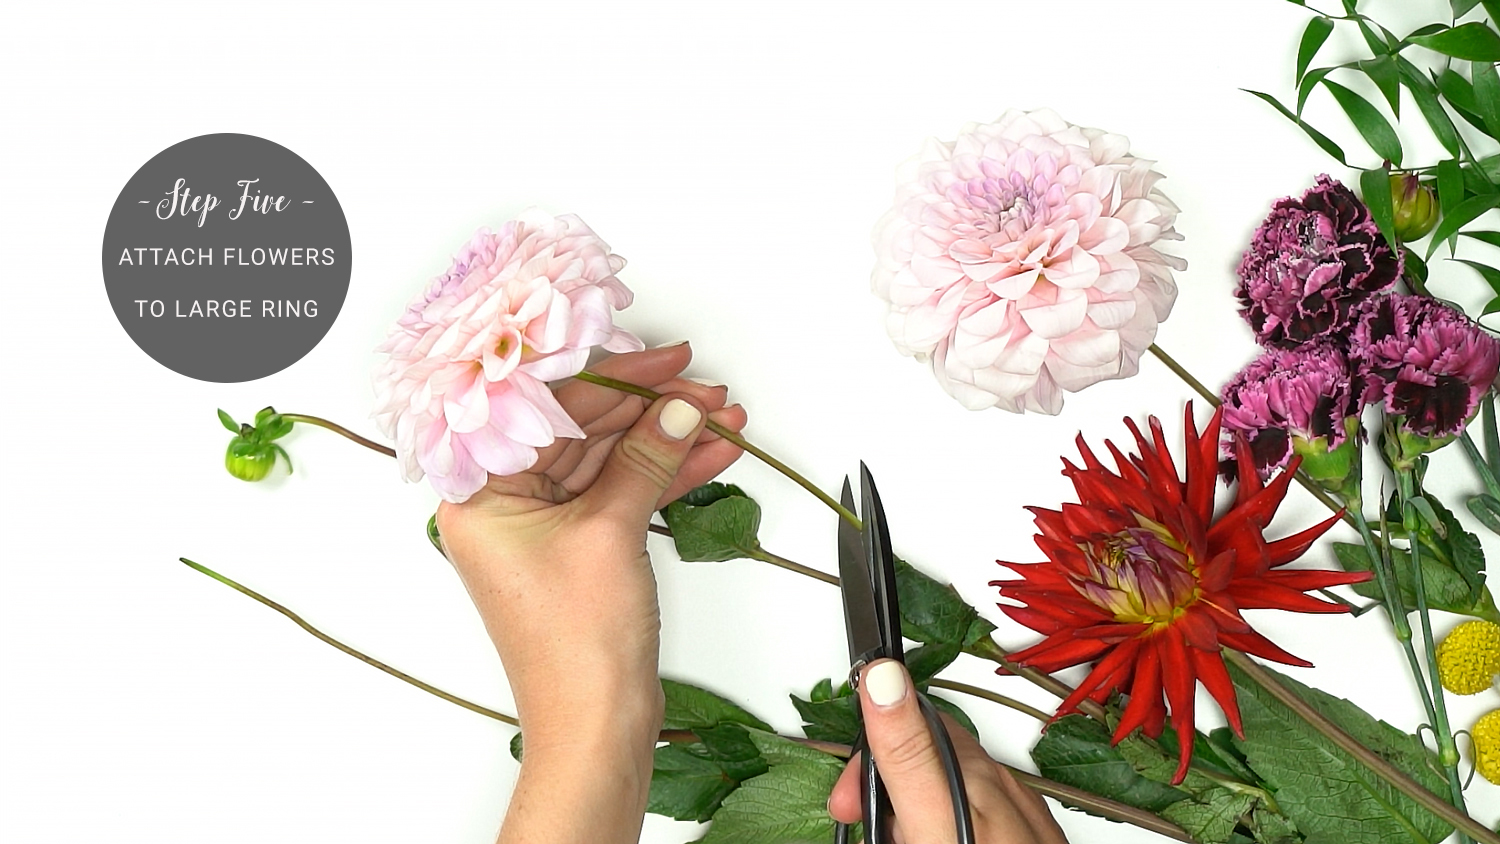
Step 5: Attach flowers to the large wire wreath.
Once you have a layer of greenery, it’s time to add the fresh blooms. Attach each bloom one-by-one by placing the stem into the foliage. Intertwining the stems of each flower through the greenery will help make sure that they stay put. Create clusters of three flowers equidistant from one another around the large wire wreath frame and then design how you’d like. Creating something unique is the best part of this project. Plus, it doesn’t have to be perfect!
Pro Tip: Be mindful of the size and colors of blooms that you use. Select a variety of flowers with different colors and textures to make your chandelier more visually appealing.
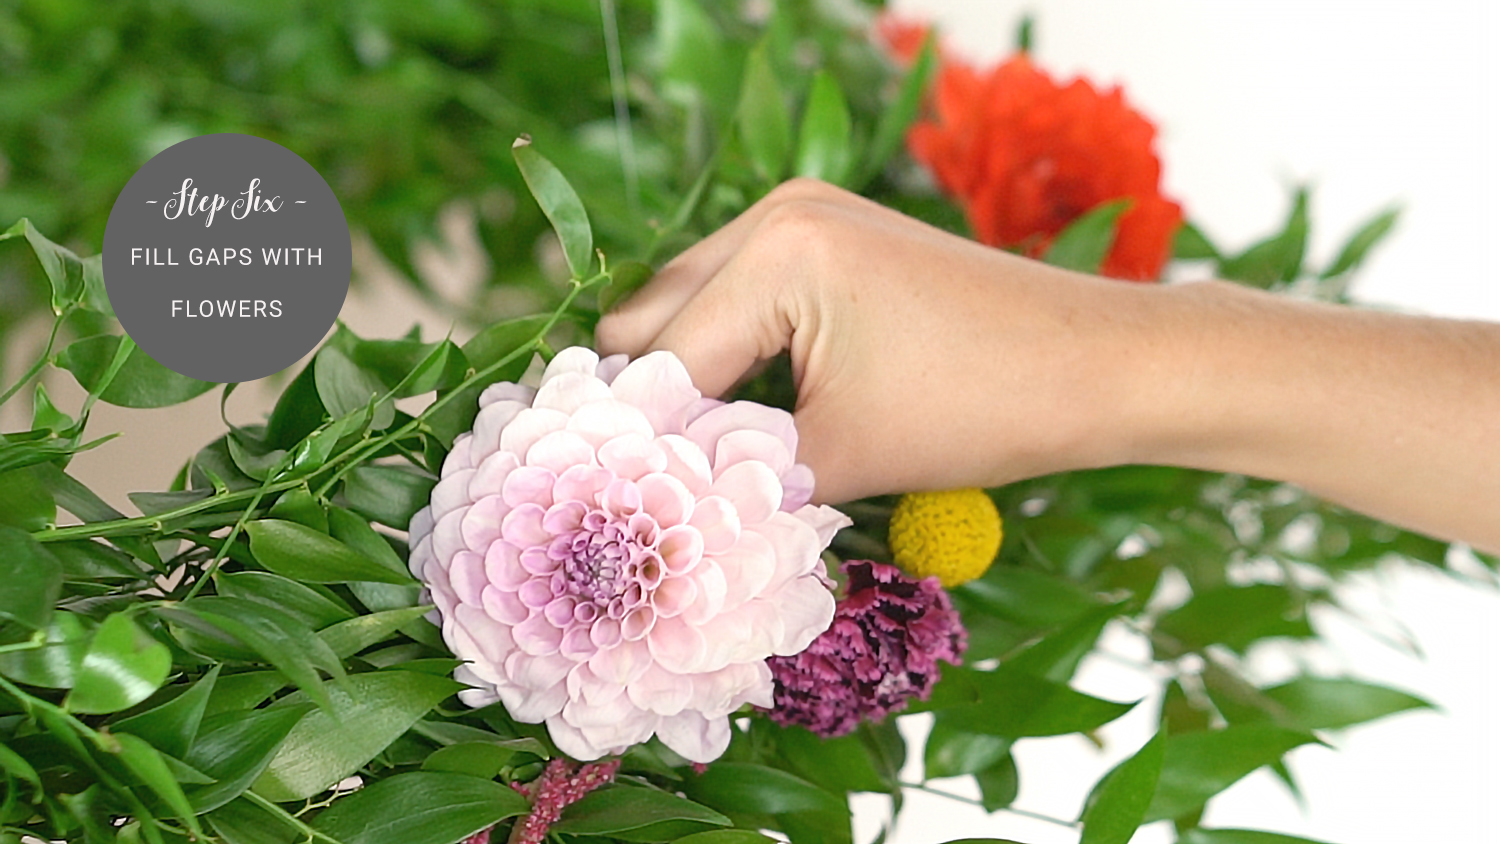
Step 6: Fill in gaps of your chandelier with small flowers and extra greenery.
Use smaller blooms and vines to fill in the gaps of your chandelier. Consider balance, color and shape of the flowers as you are adding in a few extra.
Pro Tip: Step back from your project every so often to be sure you’re on the right track.
While trends vary, we know that the flower chandelier is here to stay, and for good reason! Now that you’ve created a beautiful decor element, make sure you get to enjoy it for as long as you can with the care guidelines below.
Mist your chandelier with water before your guests arrive to ensure that your flowers look their freshest for the celebration.
Avoid hanging your chandelier in direct sunlight, near heating and cooling vents or near open windows.
Now that you have your DIY floral chandelier basics down, check out all of these unique designs for inspiration….
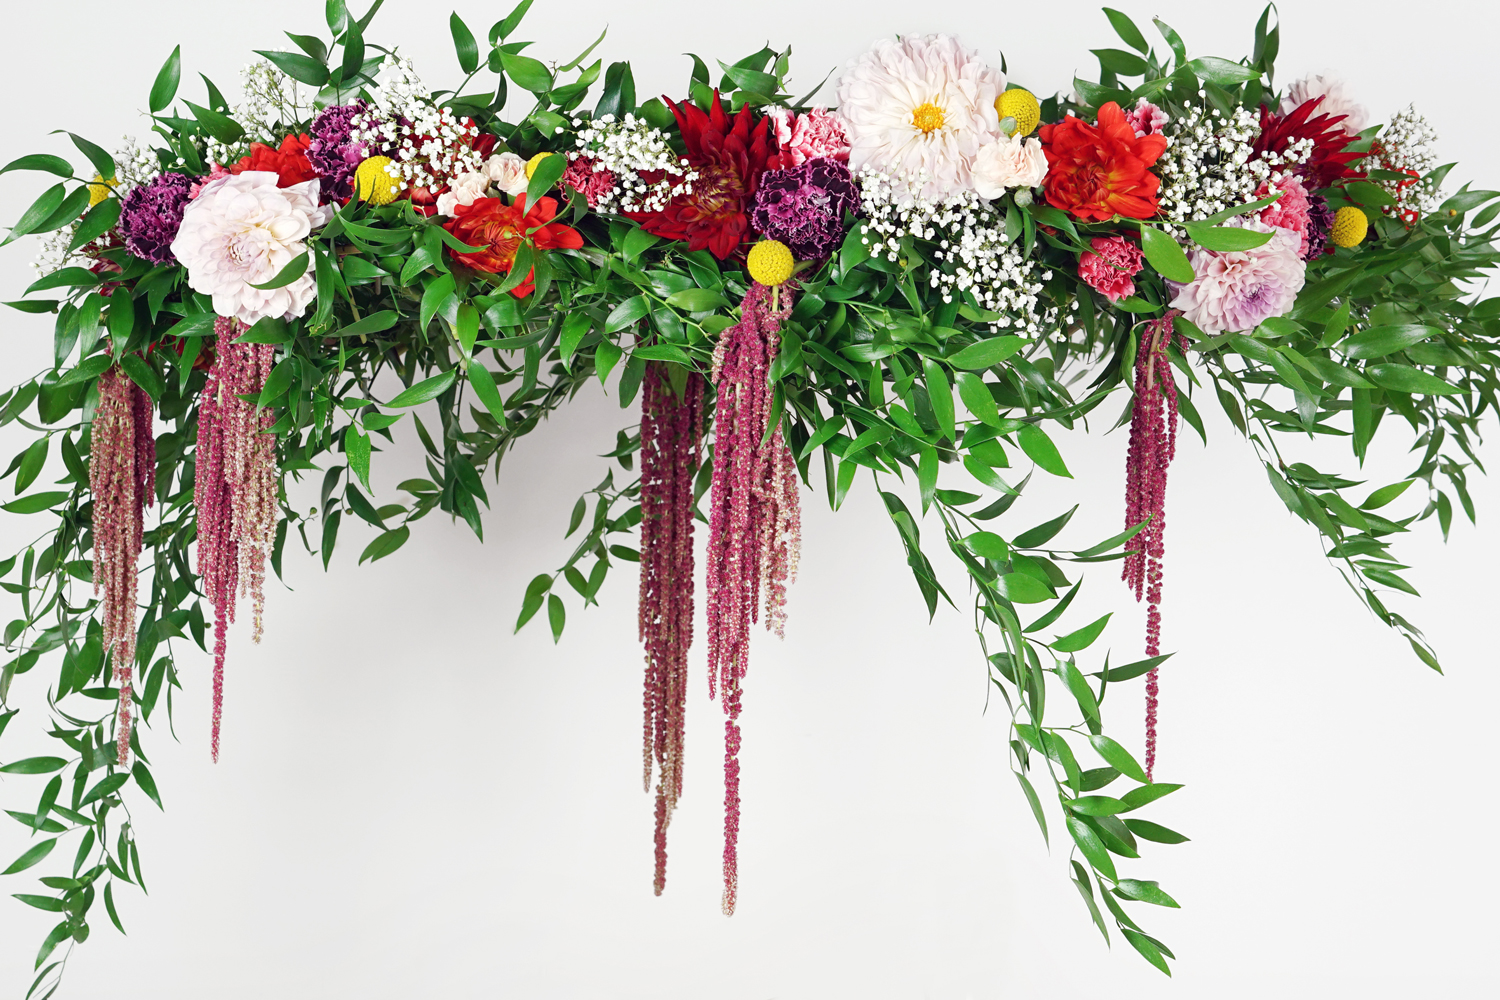
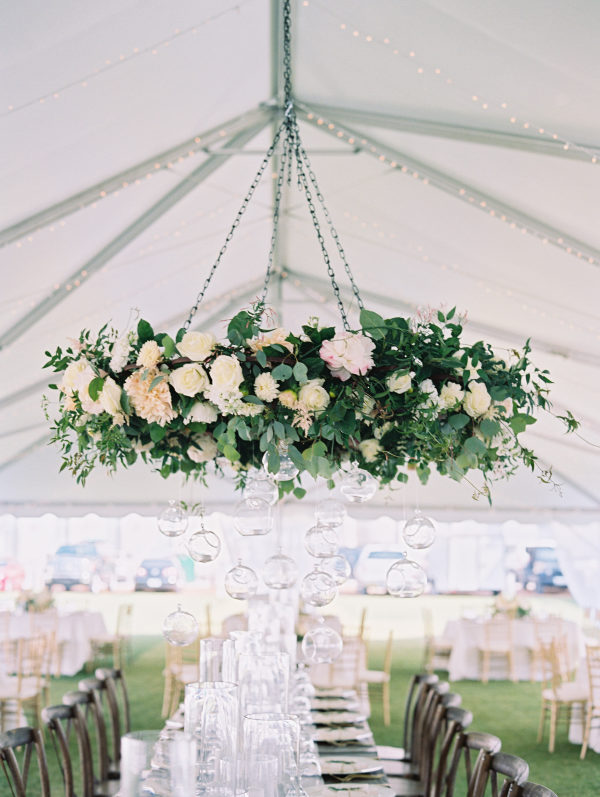
Bels Flowers || Katy Melling Photography via Rock My Wedding
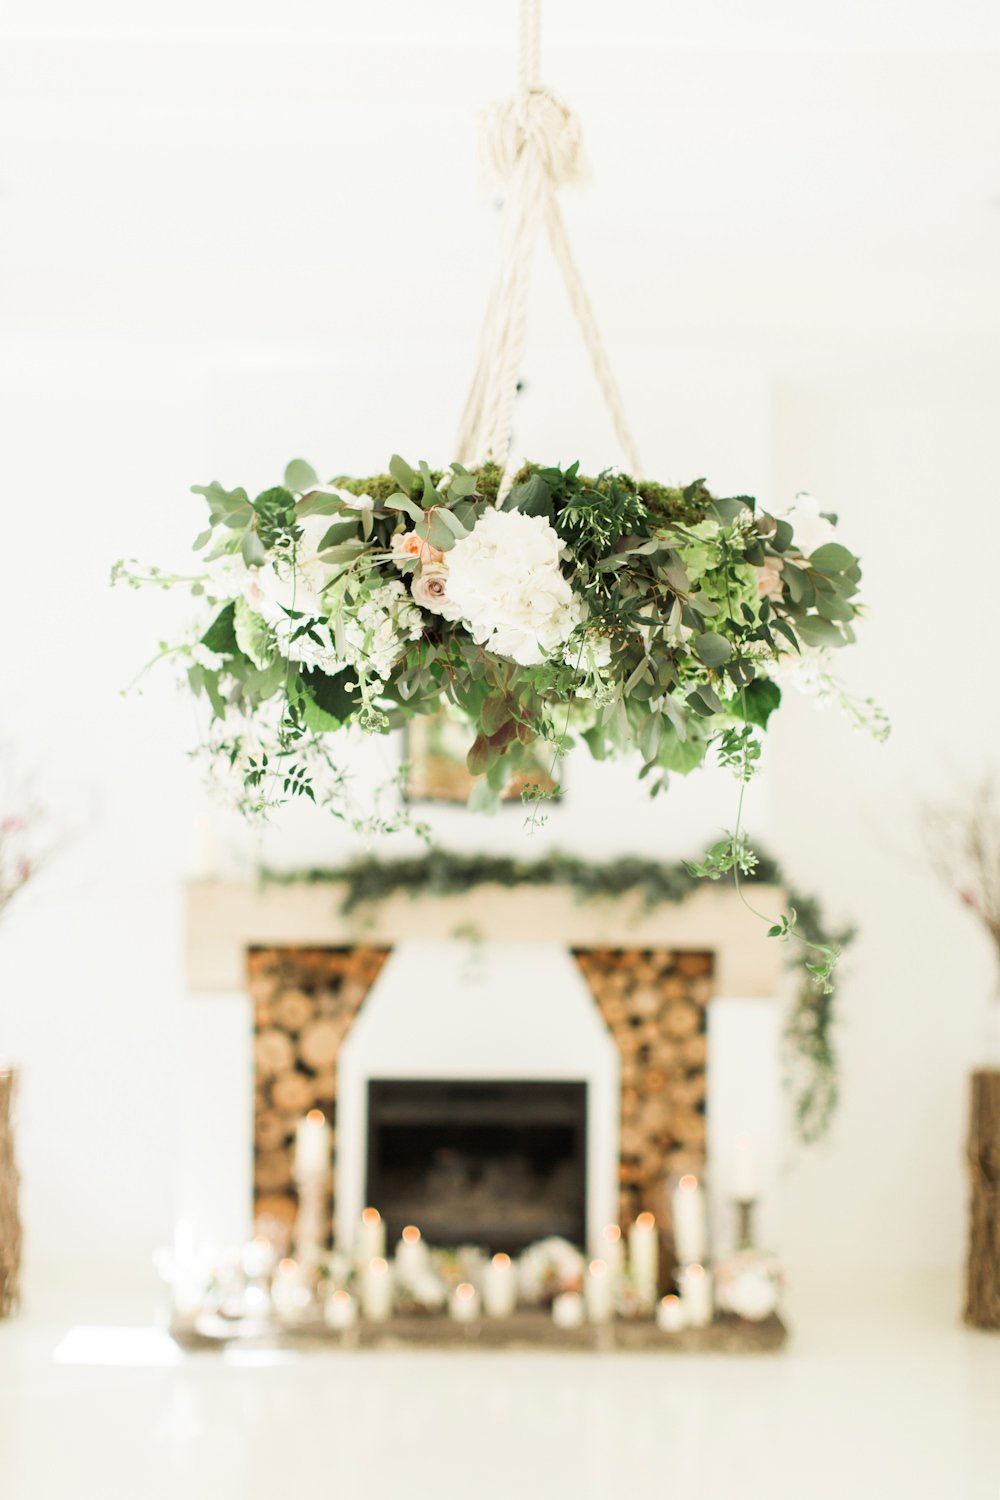
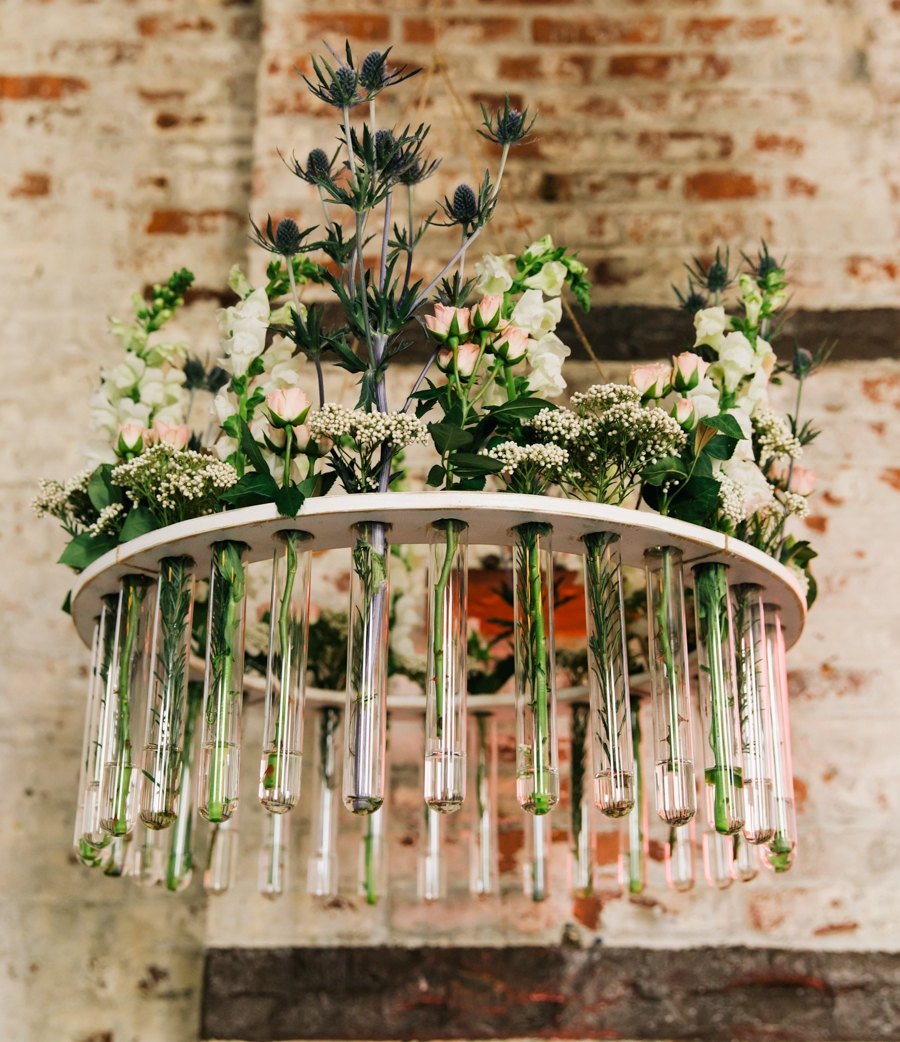
Alstonville Florist || Photography – Finch & Oak via Hello May
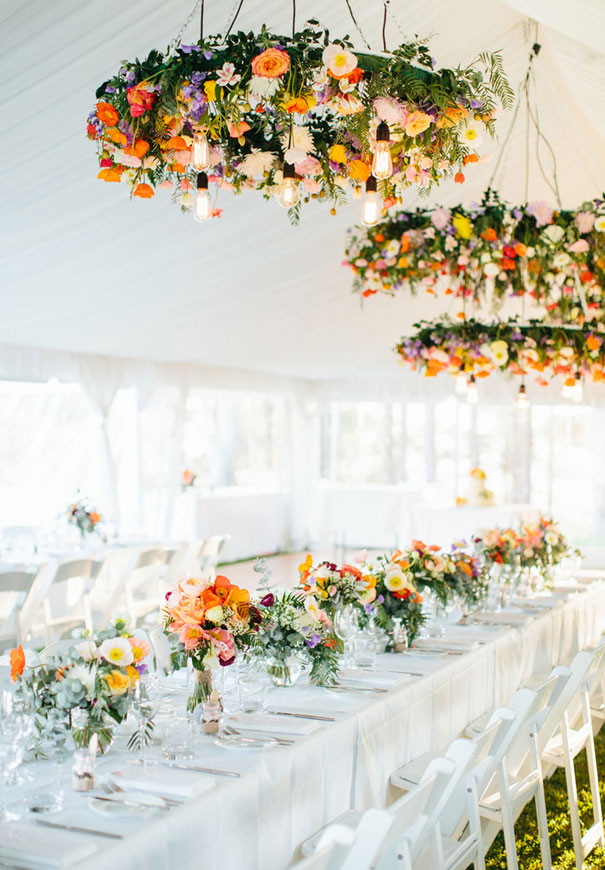
Poppy & Blush || Photography – Valorie Darling via Green Wedding Shoes
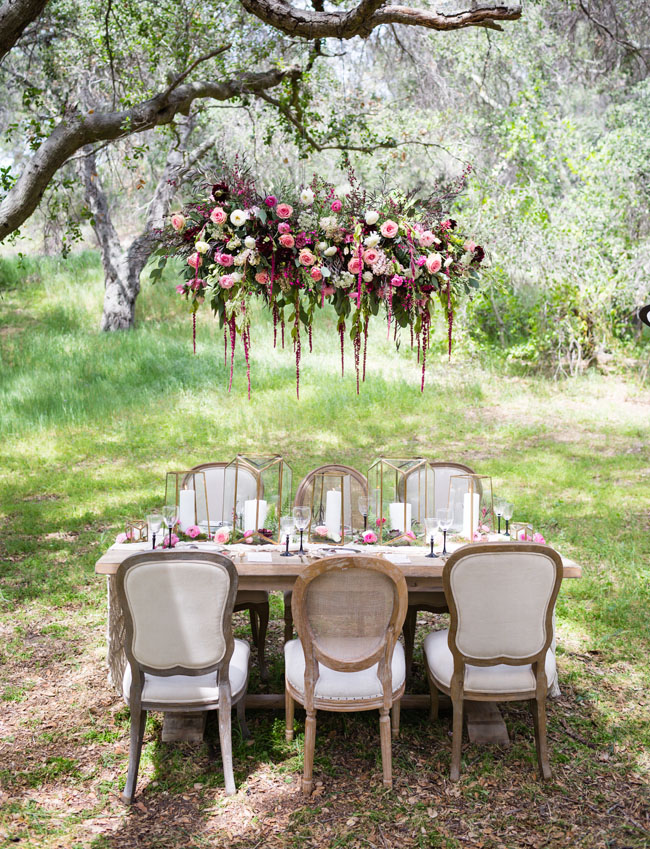
Florals by the Sea || Photography – Lauren Kinsey via Style Me Pretty
Oh and here’s a quick video (just 1 minute long!) recapping the 6 simple steps to creating a flower chandelier of your own….
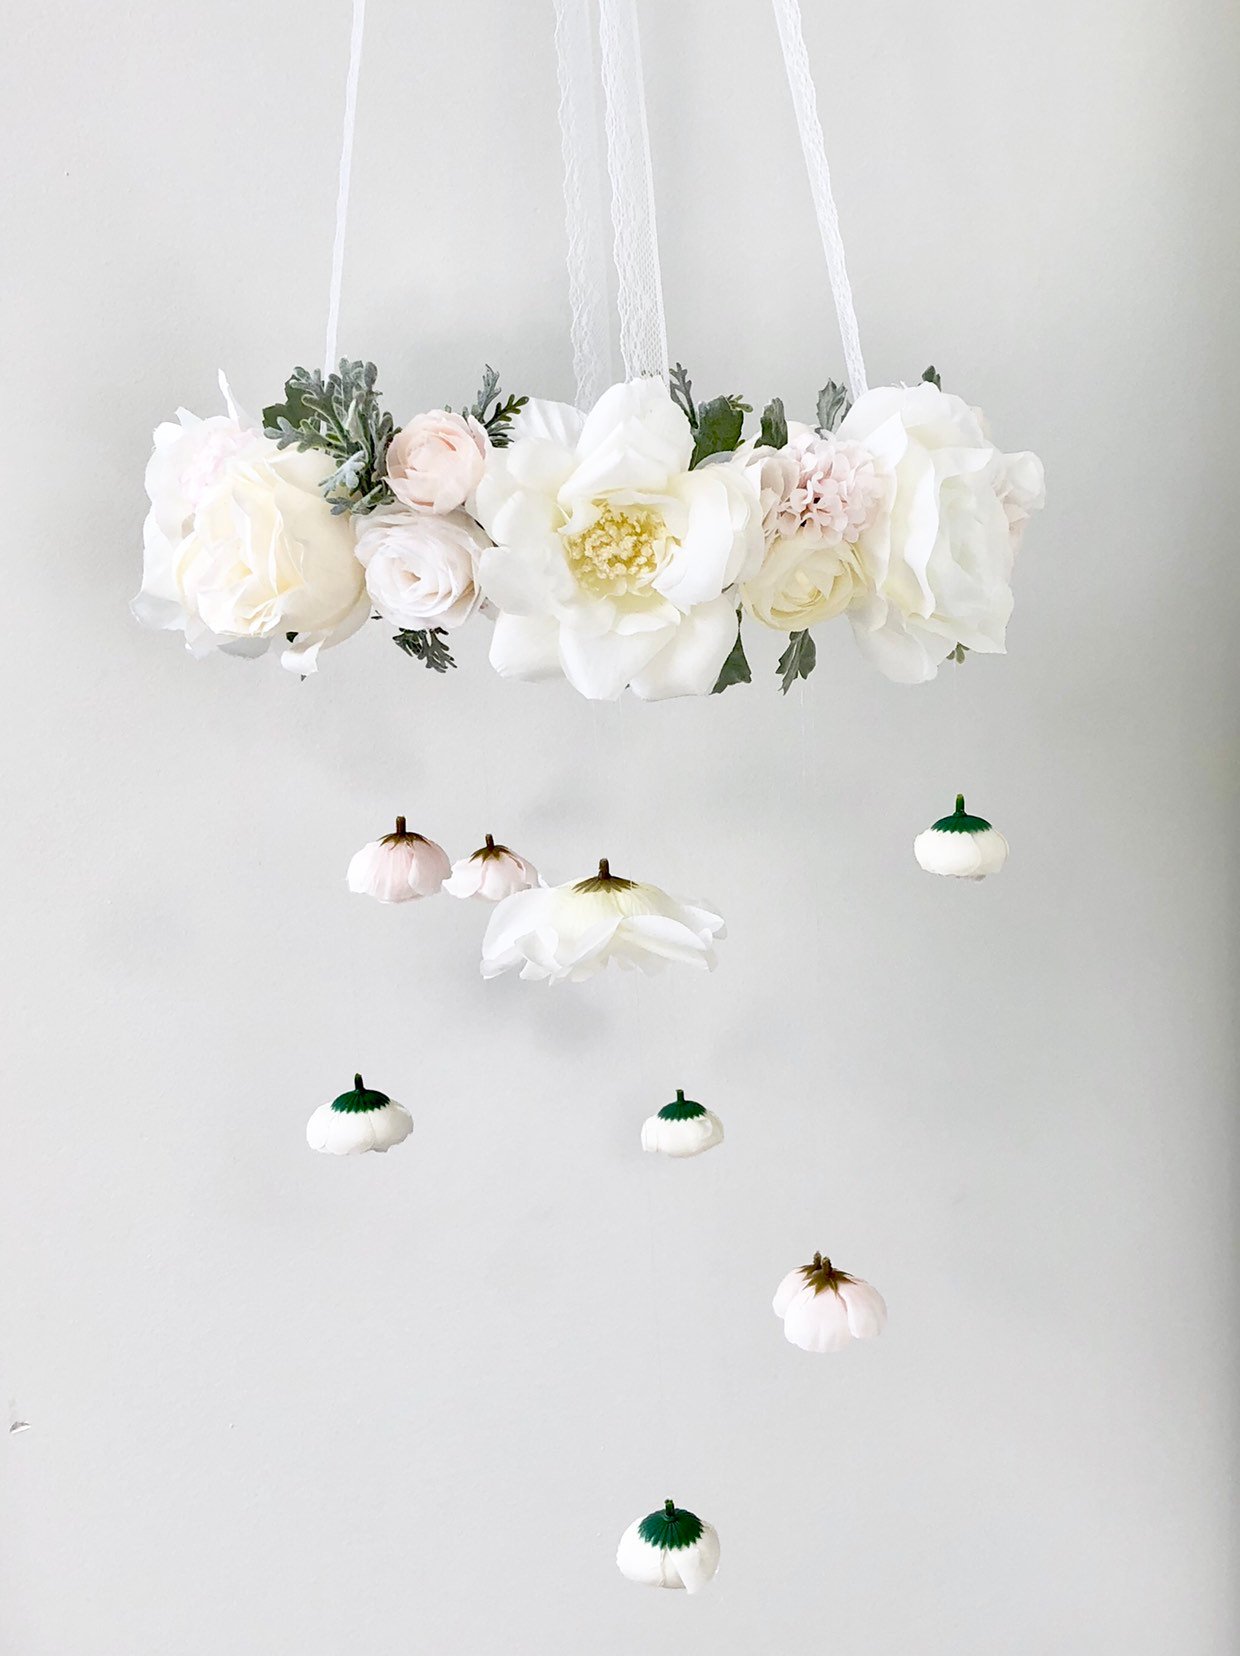
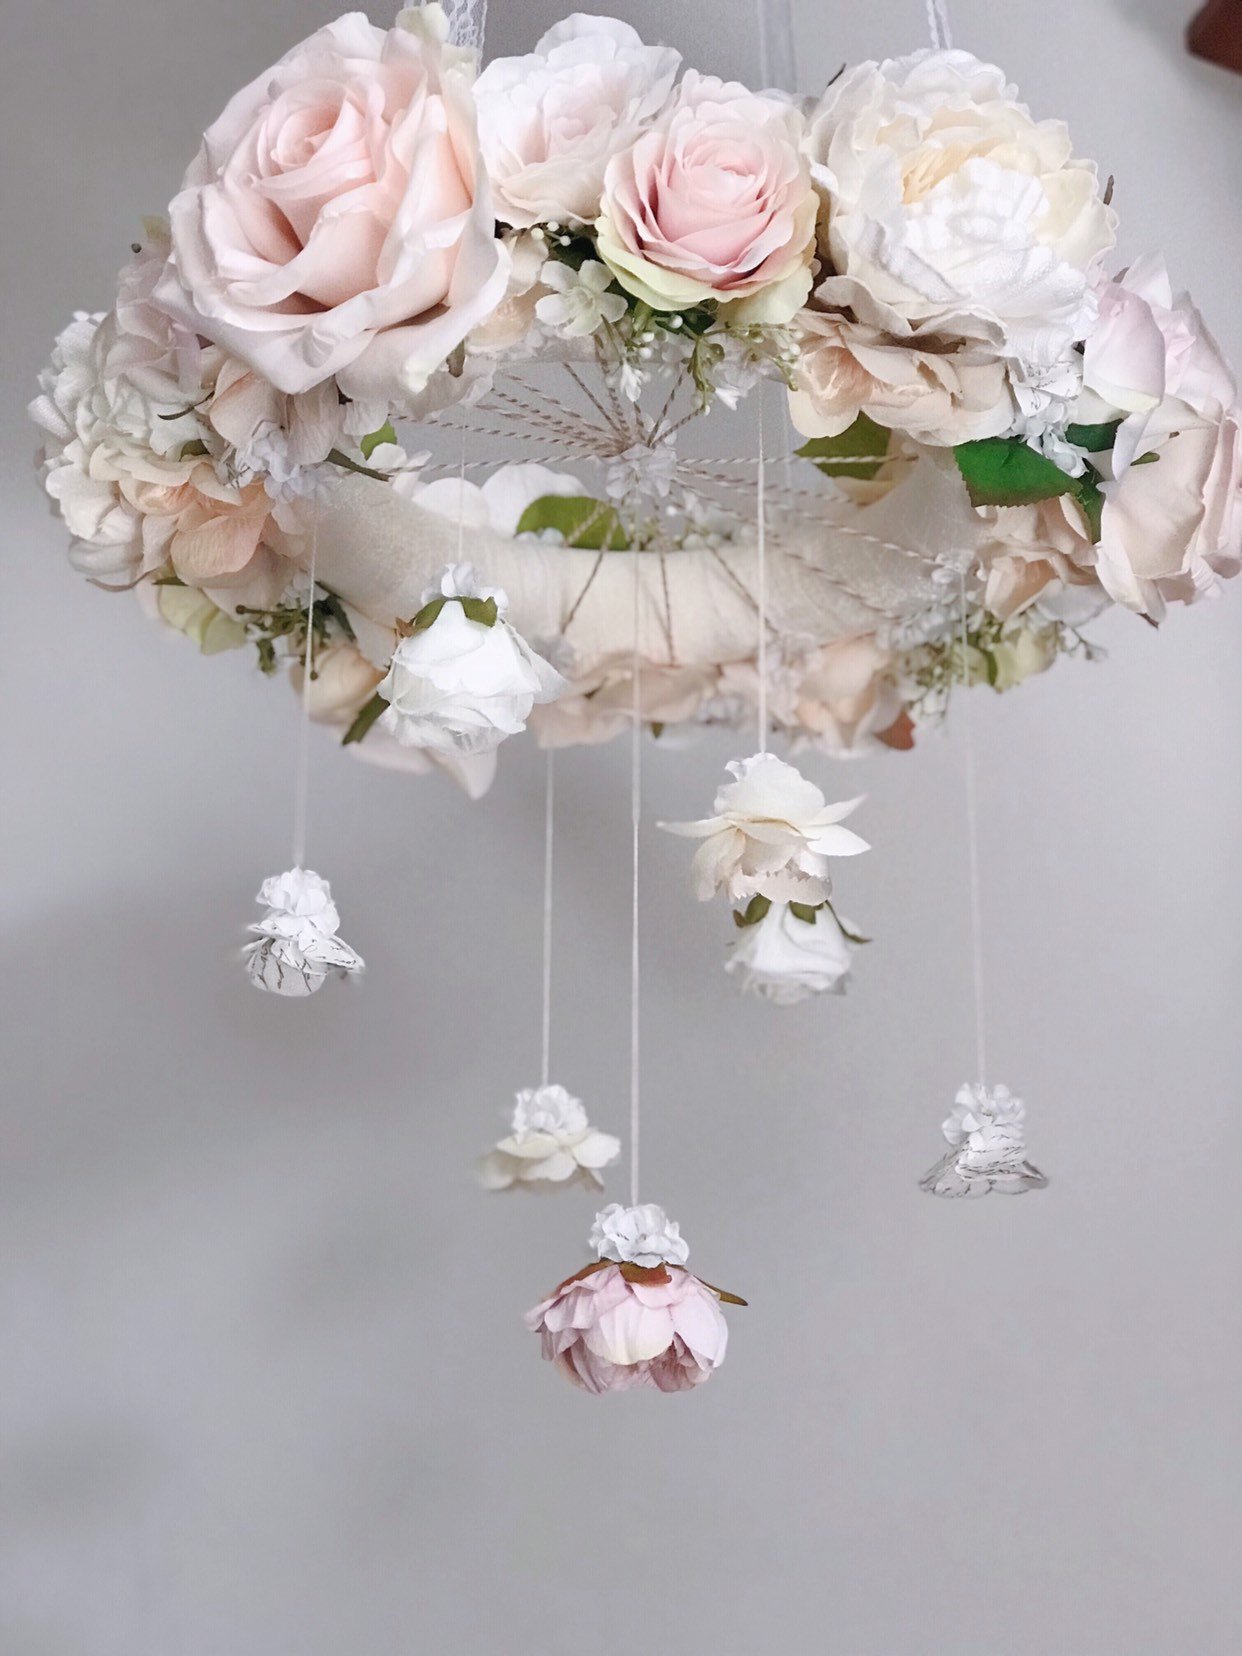
Or if you love the idea of a floral chandelier but don’t fancy DIYing one, how about buying one of these ready made beauties….
A huge thankyou to Pro Flowers for sharing this fabulous DIY with us! For more DIY projects, including a delicious donut wall tutorial, be sure to take a peek in CVB’s archives here. Or pop across to Pinterest for the best Wedding DIY finds from around the web.


